Welcome to the world of yoga!
If you’re just starting your journey, you’re in for an incredible adventure of mind, body, and spirit.
Yoga is more than just physical exercise; it’s a practice that connects breathing, movement, and mindfulness.
Whether you’re looking to improve flexibility, build strength, or find some inner peace, these ten essential yoga poses are the perfect starting point for beginners.
Pose 1: Mountain Pose (Tadasana)
Description and Benefits: Mountain Pose is the foundation of all standing poses. It might look simple, but it’s powerful in improving posture, balance, and calmness. It teaches you to stand with steady strength and poise.
Step-by-Step Instructions:
- Stand with your feet together, heels slightly apart.
- Spread your toes and press them firmly into the mat.
- Engage your thighs and lift your kneecaps without hardening your lower belly.
- Lengthen your tailbone, and imagine a string lifting you from the top of your head.
- Extend your arms along the body, palms facing inward.
- Breathe deeply and hold the pose for 30 seconds to 1 minute.
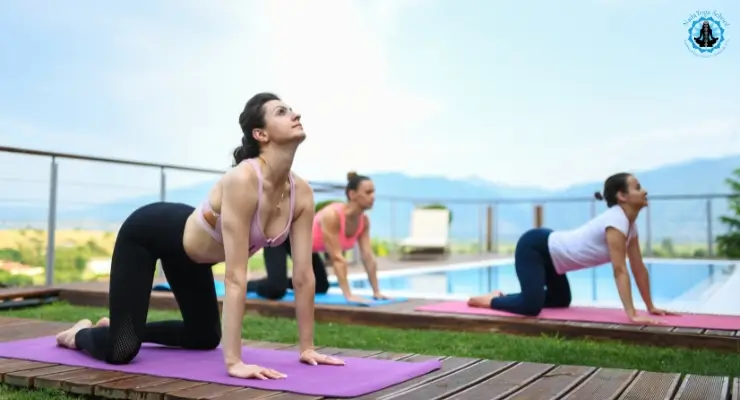
Pose 2: Downward-Facing Dog (Adho Mukha Svanasana)
Description and Benefits: This iconic pose stretches and strengthens many parts of the body, making it a staple in many yoga routines. It’s great for relieving back pain and rejuvenating the body.
Step-by-Step Instructions:
- Start on your hands and knees, aligning your wrists under your shoulders and your knees under your hips.
- Spread your fingers wide and press firmly through your palms.
- Exhale as you tuck your toes and lift your knees off the floor. Reach your pelvis up toward the ceiling.
- Gently straighten your legs and lower your heels toward the ground.
- Hold this pose for 1-3 minutes, then gently bend your knees and come back to your hands and knees.
Pose 3: Warrior I (Virabhadrasana I)
Description and Benefits: Warrior I is a standing pose that enhances strength, focus, and stability. It’s great for building lower body strength and stretching the upper body.
Step-by-Step Instructions:
- Start in Mountain Pose, then step your left foot back 3-4 feet.
- Turn your left foot to a 45-degree angle with the edge of your foot parallel with the back of the mat.
- Bend your right knee over the right ankle.
- Raise your arms overhead, reaching towards the ceiling.
- Hold for 30 seconds to 1 minute, then switch sides.
Pose 4: Triangle Pose (Trikonasana)
Description and Benefits: Triangle Pose is a wonderful pose for stretching the sides of your waist, opening up your lungs, and strengthening your legs and core.
Step-by-Step Instructions:
- From a standing position, step your feet about 4 feet apart.
- Turn your right toes out 90 degrees and your left toes in about 45 degrees.
- Extend your arms to the sides, then bend at the hip over your right leg.
- Rest your right hand on your ankle, shin, or the floor, and stretch your left hand toward the ceiling.
- Turn your gaze toward your left hand.
- Hold for 30 seconds to 1 minute, then switch sides.
Pose 5: Tree Pose (Vrksasana)
Description and Benefits: Tree Pose helps improve balance and concentration while strengthening the thighs, calves, ankles, and spine. It’s also great for improving mental focus.
Step-by-Step Instructions:
- Begin in Mountain Pose. Shift your weight slightly onto your left foot, keeping the inner foot firm to the floor.
- Bend your right knee, then reach down and clasp your right ankle.
- Draw your right foot up and place the sole against the inner left thigh; if possible, press the right heel into the inner left groin.
- Rest your hands on your hips and lengthen your tailbone toward the floor.
- When you feel balanced, press your hands together in prayer position over your chest and gaze softly at a fixed point.
- Stay for 30 seconds to 1 minute, then switch sides.
Pose 6: Seated Forward Bend (Paschimottanasana)
Description and Benefits: This pose stretches the spine, shoulders, and hamstrings. It can help calm the mind and relieve stress and is recommended for those with back issues.
Step-by-Step Instructions:
- Sit on the floor with your legs stretched out in front of you.
- Inhale and raise your arms overhead.
- Exhale and bend forward from the hip joints, not the waist. Lengthen the tailbone away from the back of your pelvis.
- Hold the sides of your feet or your ankles. If you can’t reach, loop a strap around the soles of your feet and hold it firmly.
- Stay in this pose for 1-3 minutes, then release with an inhalation lifting the torso.
Pose 7: Bridge Pose (Setu Bandhasana)
Description and Benefits: Bridge Pose is a gentle backbend that stretches the front of the body and strengthens the back and spine. It’s great for reducing stress and mild depression.
Step-by-Step Instructions:
- Lie on your back with your knees bent and feet flat on the floor, hip-width apart.
- Press your feet and arms actively into the floor and lift your hips toward the ceiling.
- Clasp your hands under your lower back and extend your arms to help you stay on the tops of your shoulders.
- Keep your thighs and feet parallel.
- Hold the pose for 30 seconds to 1 minute, then gently release.
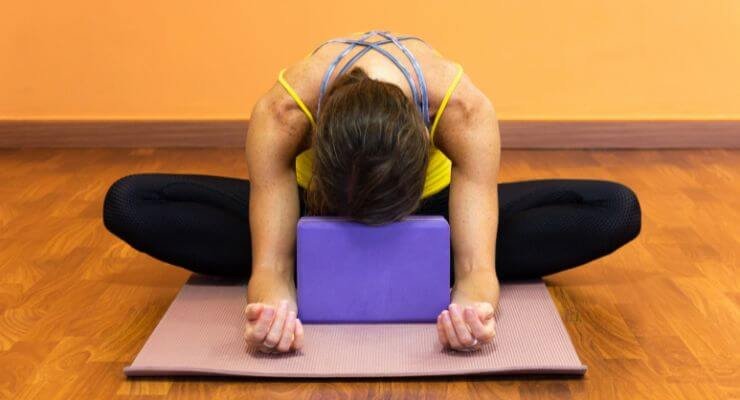
Pose 8: Child’s Pose (Balasana)
Description and Benefits: Child’s Pose is a restful pose that can be sequenced between more challenging poses. It helps to stretch the hips, thighs, and ankles while reducing stress and fatigue.
Step-by-Step Instructions:
- Kneel on the floor, touch your big toes together, and sit on your heels.
- Separate your knees about as wide as your hips.
- Exhale and lay your torso down between your thighs.
- Lay your hands on the floor alongside your torso, palms up, and release the fronts of your shoulders toward the floor.
- Stay in this pose for as long as needed for relaxation.
Pose 9: Cobra Pose (Bhujangasana)
Description and Benefits: Cobra Pose is an invigorating backbend that strengthens the spine, opens the chest, and helps to clear the passages of the heart and lungs. It’s an excellent pose for increasing flexibility in the back.
Step-by-Step Instructions:
- Lie prone on the floor with your legs stretched back, tops of the feet on the floor.
- Place your hands under your shoulders with your elbows close to your body.
- Press the tops of your feet and thighs firmly into the floor.
- On an inhalation, begin to straighten your arms to lift the chest off the floor, going only to the height at which you can maintain a connection through your pubis to your legs.
- Hold the pose for 15 to 30 seconds, breathing easily. Release back to the floor with an exhalation.
Pose 10: Corpse Pose (Savasana)
Description and Benefits: Often used to conclude a yoga practice, Corpse Pose is a deep relaxation technique. It calms the brain, relieves stress, and helps to lower blood pressure.
Step-by-Step Instructions:
- Lie on your back, letting your feet fall open slightly.
- Place your arms alongside your body, palms facing up, and relax your fingers.
- Close your eyes and breathe naturally.
- Allow your body to feel heavy on the ground.
- Stay in this pose for 5 to 10 minutes. To exit, first gently move your fingers and toes, then roll onto your right side and slowly press yourself up to a seated position.
Conclusion
Congratulations on taking your first steps into the world of yoga!
Remember, the key to success in yoga is consistent practice and listening to your body.
These ten poses provide a solid foundation for your yoga journey. As you continue to practice, you’ll discover more about the transformative power of yoga, both on and off the mat.
Embrace the journey and enjoy every moment of exploration and discovery in your practice.
Pingback: 5 Common Mistakes Yoga Beginners Make and How to Avoid Them - YOGMAY
Hello everyone, it’s my first pay a visit at this website, and paragraph is actually fruitful in favor of me, keep up posting these types of articles.